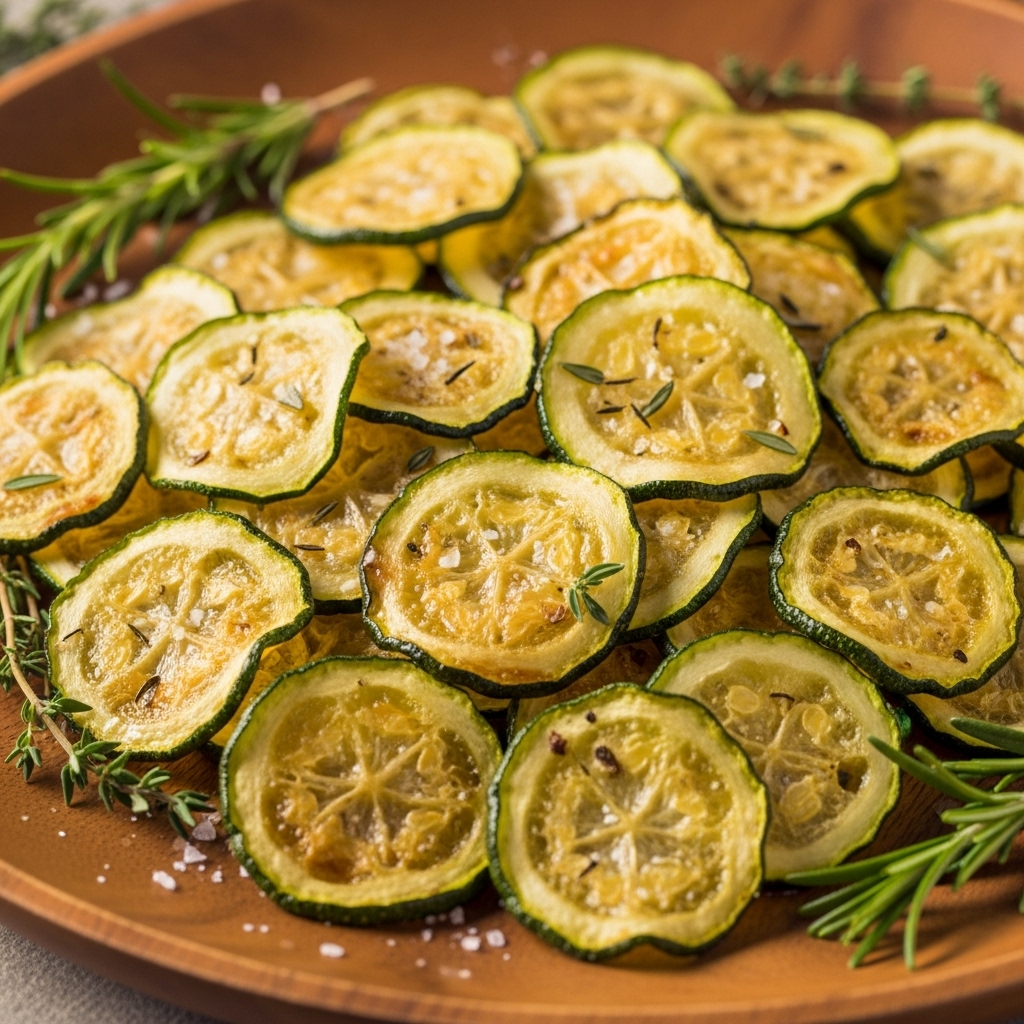
Easy Oven-Baked Zucchini Chips
Crunchy Delight: Easy Oven-Baked Zucchini Chips (Crispy and Irresistible Snack)
Are you ready to elevate your snacking game with something that’s not just healthy but also utterly scrumptious? Say hello to Easy Oven-Baked Zucchini Chips! These thin, crispy bites of joy are the perfect way to transform your garden-fresh zucchini into a light, crunchy snack that you won’t be able to resist! With their golden edges and a sprinkle of salty goodness, every chip is a crunchy delight that will leave your taste buds dancing and your heart happy. Let’s dive into the world of these irresistible zucchini chips!
Why You’ll Love This Recipe
Get ready to fall in love for so many reasons!
– Big, Bold Flavors: The combination of olive oil and salt creates a flavor explosion that enhances the natural taste of zucchini.
– Crowd-Pleaser: Perfect for sharing at gatherings, movie nights, or just as a delightful snack for yourself!
– Flexible & Fast: With just three simple ingredients and minimal prep, you can whip these up in no time.
– Healthy and Guilt-Free: They’re a fantastic alternative to traditional chips, packing in flavor without the guilt.

Ingredients You’ll Need
Gather ‘round, friends! The ingredients for these Easy Oven-Baked Zucchini Chips are simple yet powerful. The star of the show? Our lovely zucchini! Rich in vitamins and low in calories, it’s the perfect canvas for this crispy creation.
– 1 large zucchini
– 2 tablespoons olive oil
– Kosher salt
Note: You’ll find the complete list of ingredients, along with their exact measurements, in the printable recipe card at the bottom of this post.
Variations
Now, let’s talk about how customizable these zucchini chips can be! Whether you want to spice things up or add a twist, here are some tasty variations to try:
– Go Gluten-Free: Naturally gluten-free, so you can enjoy them without any worries!
– Make it Spicier: Sprinkle on some cayenne pepper or chili powder for a punch of heat.
– Swap the Dressing: Experiment with different oils like avocado or sesame for a unique flavor profile.
– Cheese it Up: Before baking, add a sprinkle of grated Parmesan for a savory, cheesy twist.
– Colorful Additions: Mix in some sliced carrots or sweet potatoes for a vibrant veggie medley!
How to Make Easy Oven-Baked Zucchini Chips
Let’s get our hands a little messy and dive into the crafting of these delightful chips!
Step 1: Preheat Your Oven
First things first, preheat your oven to a cozy 225°F (107°C). You’ll also want to line two large baking sheets with silicon baking mats or parchment paper to ensure those chips come off without a hitch!
Step 2: Slice the Zucchini
Grab a mandolin slicer, and slice your zucchini to your desired thickness. For that perfect crunch, I recommend going with a thickness of about 2.
Step 3: Extract Extra Moisture
Lay your zucchini slices on a clean sheet of paper towels. Cover them with another paper towel and gently press down. This little trick helps draw out excess moisture, ensuring crispiness galore!
Step 4: Arrange on Baking Sheets
Next, arrange the zucchini slices on the prepared baking sheets, placing them closely together but not overlapping. We want every slice to bask in that oven heat!
Step 5: Brush with Olive Oil
In a small bowl, pour in your olive oil and grab a pastry brush. Gently brush the olive oil onto each zucchini slice, giving them a lovely sheen.
Step 6: Season to Perfection
Sprinkle kosher salt evenly over the baking sheets. Remember, less is more; it’s always better to start with less salt since the chips will shrink during cooking. You can always add more later!
Step 7: Bake, Bake, Bake!
Slide those trays into the oven and let them bake for about 2 hours. Keep an eye on them until they turn golden brown and become irresistibly crispy!
Step 8: Cool and Store
Once baked, allow the chips to cool before carefully removing them from the baking sheets.
Step 9: Enjoy!
Store any leftovers in an airtight container for up to 3 days (if they last that long!).
Pro Tips for Making Easy Oven-Baked Zucchini Chips
– Use a Sharp Mandolin: The thinner your slices, the crunchier your chips will be, so make sure your mandolin is sharp.
– Don’t Overcrowd the Pan: Space them out for even baking—overlapping slices will lead to soggy chips!
– Keep an Eye on the Bake: Every oven is different, so check on your chips occasionally to prevent burning.
How to Serve Easy Oven-Baked Zucchini Chips
Garnishes
Sprinkle with fresh herbs like dill or parsley before serving for a burst of color and freshness!
Side Dishes
Pair these zucchini chips with a zesty dipping sauce, like tzatziki or a spicy sriracha mayo, for a delightful flavor contrast.
Creative Ways to Present
Serve these chips in cute individual cups or on a colorful platter for a fun snack display at your next gathering.
Make Ahead and Storage
Storing Leftovers
Keep any leftover zucchini chips in an airtight container at room temperature for up to 3 days. Trust me, they’re best enjoyed fresh!
Freezing
Unfortunately, these chips don’t freeze well. Their crispy nature just can’t handle the cold!
Reheating
If you want to revive any leftover chips, pop them back in a warm oven for a few minutes to regain their crunch.
FAQs
Can I use other vegetables?
Absolutely! Try using sweet potatoes or beets for a colorful twist.
Is this recipe spicy?
Not at all! The recipe is naturally mild, but you can add spices to kick it up as you like.
How do I make this gluten-free?
This recipe is naturally gluten-free, so no adjustments are needed!
Can I prepare this in advance?
Yes! You can slice the zucchini and refrigerate them ahead of time. Just make sure to draw out the moisture before baking.
Final Thoughts
There you have it—Easy Oven-Baked Zucchini Chips that are not only a delightful snack option but also a fun way to enjoy fresh zucchini! With their irresistible crunch and endless possibilities for flavor, these chips are sure to become a favorite in your household. So grab your zucchini and get ready to snack like never before! Happy cooking! 🌟
Easy Oven-Baked Zucchini Chips

Discover the perfect snack with these Easy Oven-Baked Zucchini Chips! Thin, crispy, and seasoned to perfection, these chips are a delightful way to enjoy fresh zucchini from your garden. Ideal for satisfying cravings without the guilt, they are simple to make and can be customized to your taste. Enjoy them alone or pair them with your favorite dip!
- Prep Time: 10 minutes
- Cook Time: 120 minutes
- Total Time: 2 hours 10 minutes
- Yield: Approximately 50 chips 1x
- Category: Snack
- Method: Baking
- Cuisine: American
Ingredients
- 1 large zucchini
- 2 tablespoons olive oil
- Kosher salt (to taste)
Instructions
- Preheat the oven to 225°F (107°C). Line two large baking sheets with silicone mats or parchment paper.
- Use a mandolin to slice the zucchini into thin rounds (about 1/8 inch thick).
- Place the slices between paper towels and press gently to remove excess moisture.
- Arrange the zucchini slices in a single layer on the prepared baking sheets, ensuring they do not overlap.
- Brush each slice lightly with olive oil using a pastry brush.
- Sprinkle a light dusting of kosher salt over the slices.
- Bake for 2 hours or until golden brown and crisp.
- Allow to cool before serving. Store in an airtight container for up to 3 days.
Nutrition
- Serving Size: 1 chip (approximately 1g)
- Calories: 54
- Sugar: 1 g
- Sodium: 0 mg
- Fat: 5 g
- Saturated Fat: 0.7 g
- Unsaturated Fat: 4.3 g
- Trans Fat: 0 g
- Carbohydrates: 1 g
- Fiber: 0 g
- Protein: 0 g
- Cholesterol: 0 mg