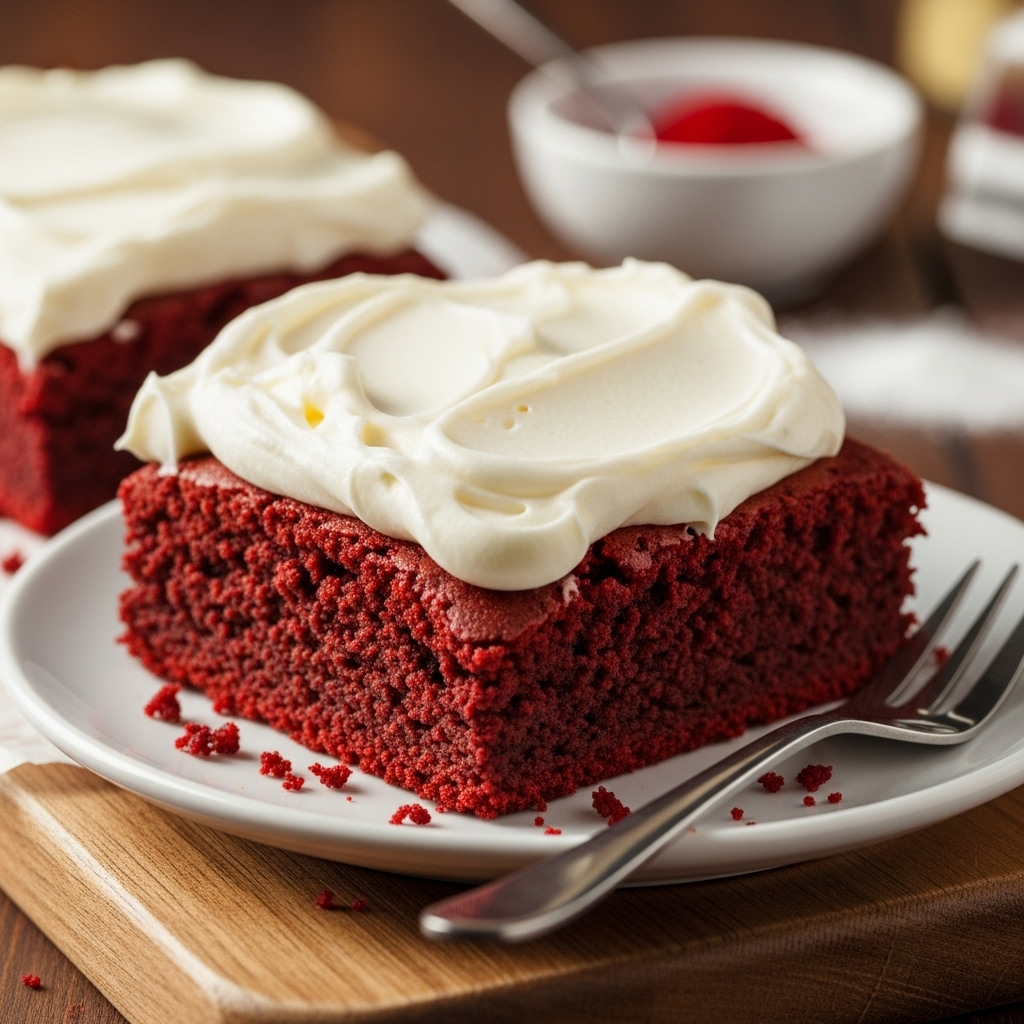
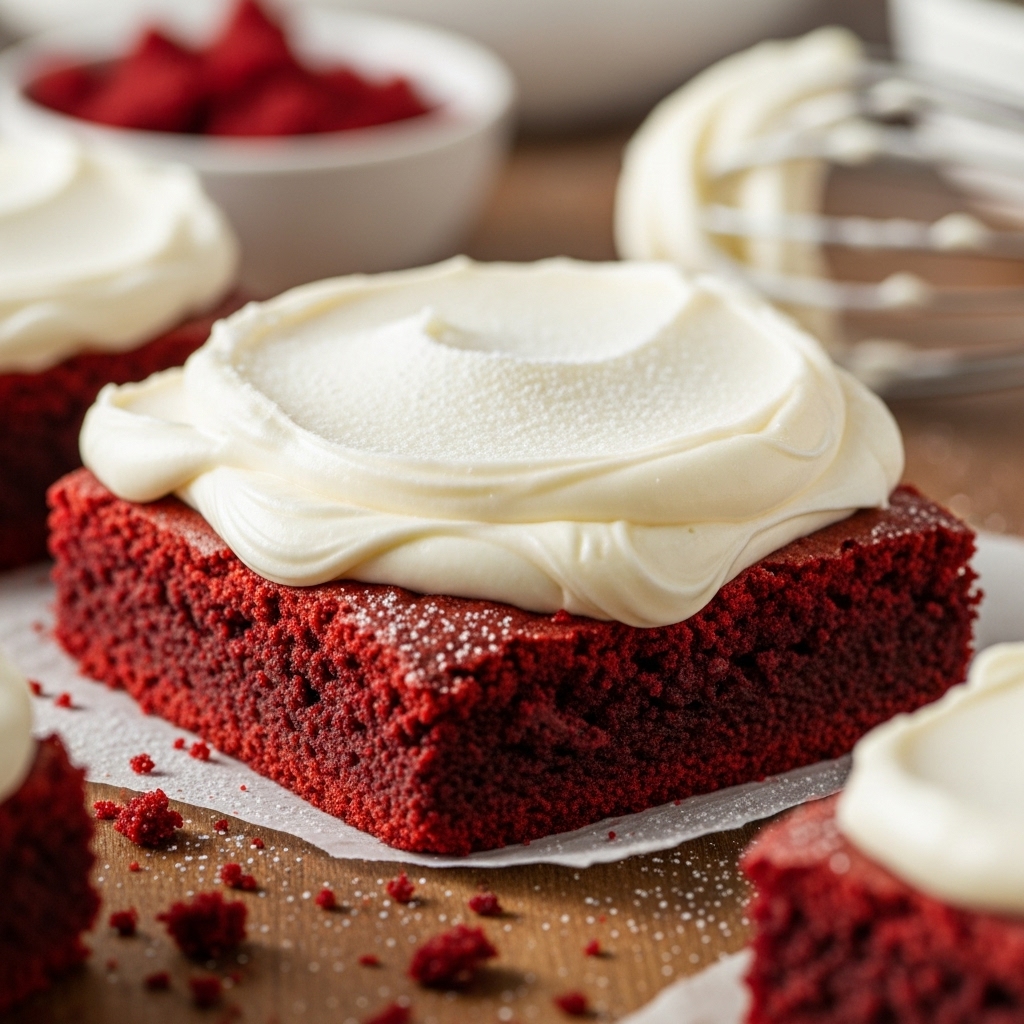
Red Velvet Brownies
Velvet Dreams in Brownie Form (Decadent Red Velvet Brownies with Cream Cheese Frosting)
If you’re on a quest for a dessert that combines the richness of chocolate, the alluring hue of crimson, and the creamy delight of frosting, look no further! These Red Velvet Brownies are not just any brownies; they’re a dreamy, chewy treat topped with the most luscious cream cheese frosting you can imagine. Picture sinking your teeth into a fudgy masterpiece that melts in your mouth, with just a hint of cocoa and a delightful splash of vanilla. Perfect for any occasion, these brownies will make anyone feel like royalty!
Why You’ll Love This Recipe
Get ready to fall in love with brownies all over again!
– Big, Bold Flavors: The unique combination of chocolate and vanilla creates a symphony of taste.
– Dairy-Free Option: Easily adaptable for those with food allergies—everyone can enjoy!
– Quick & Simple: With just a few steps, you can whip up these beauties in no time.
– Showstopper Presentation: The vibrant color and creamy frosting make these brownies a visual feast!
Ingredients You’ll Need
Gather around, sweet tooth enthusiasts! This recipe calls for some fantastic ingredients that create an unforgettable flavor explosion. The star here? That eye-catching red food coloring, which transforms ordinary brownies into a jewel-like dessert worth celebrating!
– 3/4 cup butter, melted (regular or dairy-free)
– 3/4 cup light brown sugar
– 1 cup granulated sugar
– 2 eggs
– 1 tbsp vanilla extract
– ½ teaspoon liquid red food coloring (SEE NOTES)
– 1½ teaspoon white vinegar
– 1/4 cup cocoa powder
– 1/4 tsp salt
– 1 cup + 3 tbsp all-purpose flour (SEE NOTES)
– 4 oz plain cream cheese, room temperature (SEE NOTES IF DAIRY FREE)
– ¼ cup butter, softened (dairy-free or regular)
– ½ teaspoon vanilla extract
– Pinch of salt
– 1½-2 cups powdered sugar (icing sugar)
– 2 Tablespoons cornstarch (ONLY IF DAIRY FREE, SEE NOTES)
*Note: You’ll find the complete list of ingredients, along with their exact measurements, in the printable recipe card at the bottom of this post.*
Variations
One of the best things about these Red Velvet Brownies is how customizable they are! Let your creativity shine with these fun variations:
– Go Gluten-Free: Swap the all-purpose flour for a gluten-free blend.
– Add Extra Protein: Stir in some chopped nuts or even chocolate chips for a delightful crunch!
– Make it Spicier: A pinch of cayenne can add an unexpected warmth to your brownies.
– Swap the Frosting: Try a classic chocolate ganache or a tangy lemon frosting for a twist!
– Colorful Additions: Top with sprinkles or edible glitter for a festive flair.
How to Make Red Velvet Brownies
Ready to dive into baking? Let’s get started on these Red Velvet Brownies!
Step 1: Preheat & Prepare
Preheat your oven to 350°F (175°C) and line an 8×8 square baking pan with parchment paper. Make sure to leave some parchment hanging over the edges—this will help you lift out the brownies like a pro!
Step 2: Melt the Butter
Melt the butter in the microwave or on the stove. Once it’s beautifully melted, transfer it to a medium-sized bowl, letting its warmth infuse into the mix.
Step 3: Mix Sugars
Add both the light brown sugar and granulated sugar to the melted butter. Whisk them together vigorously until the mixture becomes a glossy paste that clings to the sides of the bowl.
Step 4: Add the Egg & Color
Crack in the eggs and mix in the vinegar, vanilla extract, and the magical red food coloring. Whisk until everything is combined and vibrant. Feel free to add a tad more coloring if you want a bolder red!
Step 5: Combine Dry Ingredients
Incorporate the dry ingredients—cocoa powder, salt, and flour—by sifting or whisking them into the wet mixture. Mix gently until just combined; a minute will do!
Step 6: Pour & Spread
Pour that gorgeous batter into the prepared baking pan, using a spatula to ensure every last bit is scraped out.
Step 7: Bake to Perfection
Bake for 30-40 minutes. Begin the toothpick test at 30 minutes; the brownies should have a crinkly top and come out with a few moist crumbs—this is the sweet spot!
Step 8: Cool & Frost
While your brownies cool, whip up the cream cheese frosting.
For the Cream Cheese Frosting
In a new mixing bowl, beat together the cream cheese, softened butter, salt, and vanilla until smooth. Gradually add powdered sugar until you reach the perfect spreadable consistency. If using dairy-free cream cheese, whisk in cornstarch to thicken.
Step 9: Frost & Serve
Let your brownies cool completely before slathering on that creamy frosting. Store them in the fridge, or keep them unfrosted until it’s time to serve.
Pro Tips for Making Red Velvet Brownies
– Don’t Overmix: When combining dry and wet ingredients, just mix until incorporated. Overmixing can lead to tough brownies!
– Check for Doneness: Remember, a few moist crumbs on the toothpick indicate delicious gooiness.
– Cool Completely: Allow the brownies to cool fully before frosting to prevent melting and sliding.
– Frosting Texture: If your frosting is too runny, add a bit more powdered sugar to achieve that dreamy, spreadable texture.
How to Serve Red Velvet Brownies
Garnishes
Elevate your brownies with a sprinkle of crushed nuts, a dusting of cocoa powder, or a drizzle of chocolate sauce.
Side Dishes
Pair them with a scoop of vanilla ice cream or fresh berries for a touch of fruity tartness that balances the sweetness!
Creative Ways to Present
Serve brownies in individual cups, on a rustic wooden platter, or in elegant cupcake liners for a delightful dessert table display.
Make Ahead and Storage
Storing Leftovers
Store leftover Red Velvet Brownies in an airtight container in the fridge for up to 5 days. They’ll taste just as delicious!
Freezing
Yes! These brownies freeze beautifully. Cut them into squares, wrap each piece tightly in plastic wrap, and place them in a freezer-safe bag for up to 3 months.
Reheating
When you’re ready to indulge again, simply let them thaw at room temperature for a bit, or pop them in the microwave for a few seconds to warm them up!
FAQs
Can I use a different color food coloring?
Absolutely! While red is traditional for red velvet, feel free to experiment with your favorite colors.
Is this recipe spicy?
Not at all! The flavors are rich and sweet, with no heat. However, you can add a pinch of cayenne for a spicy twist!
Can I prepare this in advance?
Yes! These brownies can be made ahead of time and stored unfrosted until you’re ready to serve.
How do I make this gluten-free?
Simply swap out the all-purpose flour for a gluten-free flour blend!
Final Thoughts
There you have it! These Red Velvet Brownies are the perfect way to treat yourself or impress your friends at any gathering. With their rich, delicious flavor and eye-catching color, they’re sure to be a hit. So, grab your apron and get baking—your taste buds will thank you! Enjoy every gooey bite and let the sweet moments unfold!
Red Velvet Brownies

Indulge in the rich, velvety goodness of these Red Velvet Brownies topped with luscious cream cheese frosting. Perfectly chewy and irresistibly delicious, these brownies not only satisfy your sweet tooth but can also be made dairy-free, making them suitable for those with food allergies. Whether for a special occasion or a simple treat, these brownies are sure to impress!
- Prep Time: 10 minutes
- Cook Time: 30–40 minutes
- Total Time: 0 hours
- Yield: Makes 16 brownies 1x
- Category: Dessert
- Method: Baking
- Cuisine: American
Ingredients
- 3/4 cup butter, melted (regular or dairy-free)
- 3/4 cup light brown sugar
- 1 cup granulated sugar
- 2 large eggs
- 1 tbsp vanilla extract
- ½ tsp liquid red food coloring
- 1½ tsp white vinegar
- 1/4 cup cocoa powder
- 1/4 tsp salt
- 1 cup + 3 tbsp all-purpose flour
- 4 oz plain cream cheese, room temperature (dairy-free option available)
- 1/4 cup butter, softened (dairy-free or regular)
- 1/2 tsp vanilla extract (for frosting)
- Pinch of salt (for frosting)
- 1½ – 2 cups powdered sugar (icing sugar)
- 2 tbsp cornstarch (only if dairy-free)
Instructions
- Preheat oven to 350°F and line an 8×8 square baking pan with parchment paper.
- Melt butter and mix with light brown sugar and granulated sugar until smooth.
- Add eggs, vinegar, vanilla extract, and red food coloring; mix until combined.
- Stir in cocoa powder, salt, and flour until just combined.
- Pour batter into prepared pan; bake for 30-40 minutes until a toothpick inserted shows few wet crumbs.
- For the frosting, beat cream cheese, softened butter, salt, and vanilla until smooth. Gradually add powdered sugar until desired consistency is reached.
- Cool brownies completely before frosting.
Nutrition
- Serving Size: 1 serving
- Calories: 291
- Sugar: 37g
- Sodium: 226mg
- Fat: 12g
- Saturated Fat: 7g
- Unsaturated Fat: 4g
- Trans Fat: 0g
- Carbohydrates: 49g
- Fiber: <1g
- Protein: 3g
- Cholesterol: 41mg